Making putty slime has become a popular pastime for both kids and adults alike. It’s not only an enjoyable activity but also a great way to unleash creativity and relieve stress. With just a few simple ingredients, you can create your very own putty slime at home. Whether you're a beginner or looking to experiment with advanced techniques, this guide will walk you through everything you need to know about making putty slime.
Slime making is more than just a craft project; it’s a hands-on learning experience that teaches about the properties of different materials and the science behind polymers. Many people have discovered the therapeutic benefits of playing with slime, which can help reduce anxiety and improve focus.
By following our step-by-step instructions, you'll be able to create a variety of putty slime textures and colors. This guide covers everything from basic recipes to advanced tips, ensuring you have all the information you need to get started. So, let’s dive in and learn how to make putty slime like a pro!
Read also:Join Wewillwritecom Unlock Your Writing Potential And Boost Your Online Presence
Table of Contents:
- Introduction to Putty Slime
- Tools and Materials Needed
- Basic Putty Slime Recipe
- Types of Putty Slime
- Safety Tips for Making Putty Slime
- Customizing Your Slime
- Troubleshooting Common Issues
- Advanced Techniques for Slime Making
- Health Benefits of Playing with Slime
- Conclusion
Introduction to Putty Slime
Putty slime is a fascinating material that combines the elasticity of rubber with the stretchiness of slime. It's made by mixing various household ingredients to create a substance that can stretch, bounce, and even mold into different shapes. Understanding the basics of how to make putty slime is essential before diving into more complex recipes.
What Makes Putty Slime Unique?
Putty slime has unique properties that make it an ideal material for sensory play. Unlike traditional slime, putty slime tends to be firmer and more rubber-like, which allows for a wider range of textures and uses. These properties are achieved by carefully balancing the ingredients used in the recipe.
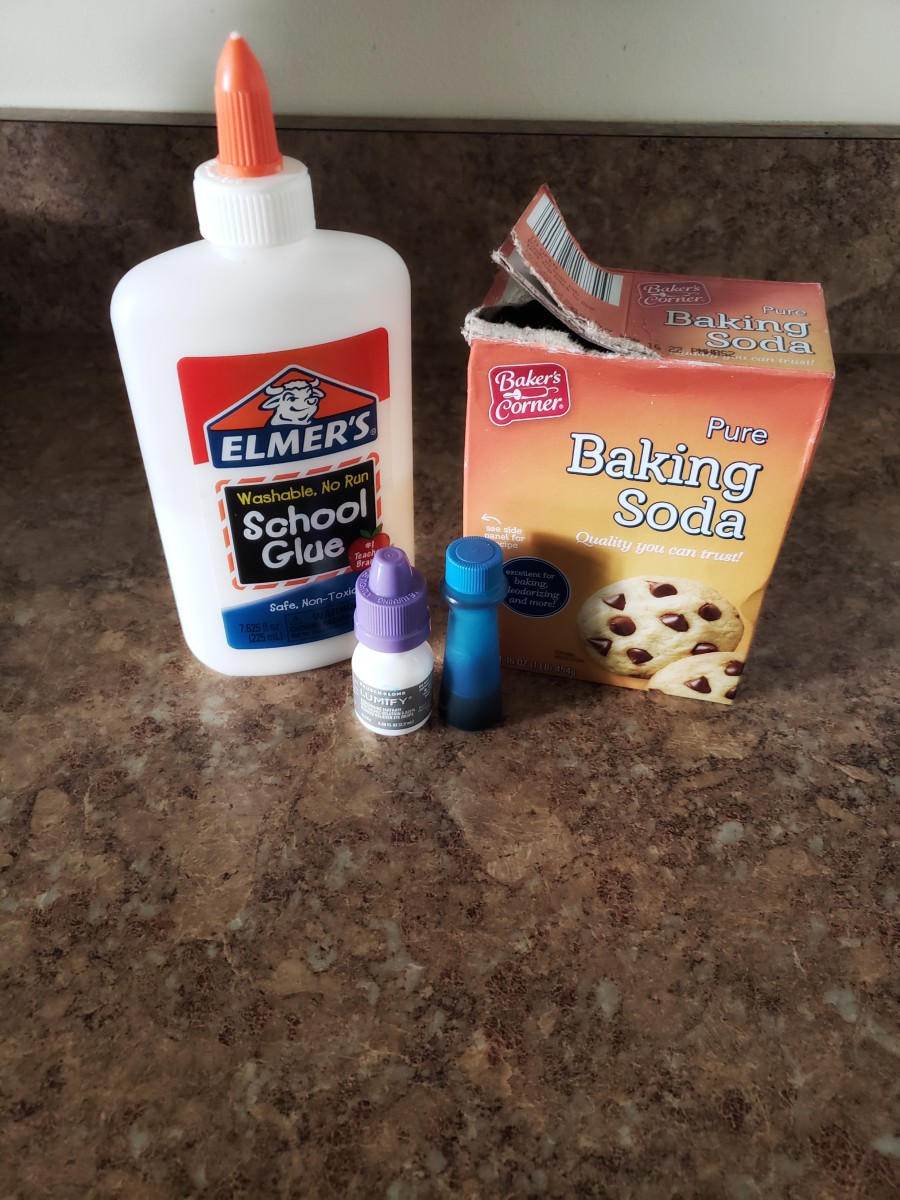
Tools and Materials Needed
Before you begin making putty slime, it’s important to gather all the necessary tools and materials. This will ensure a smooth and enjoyable slime-making experience.
Basic Materials
- Glue (white school glue or clear glue)
- Borax powder or liquid starch
- Water
- Food coloring (optional)
- Glitter or other decorative items (optional)
Tools
- Mixing bowl
- Spoon or stirring stick
- Measuring cups and spoons
- Airtight container for storage
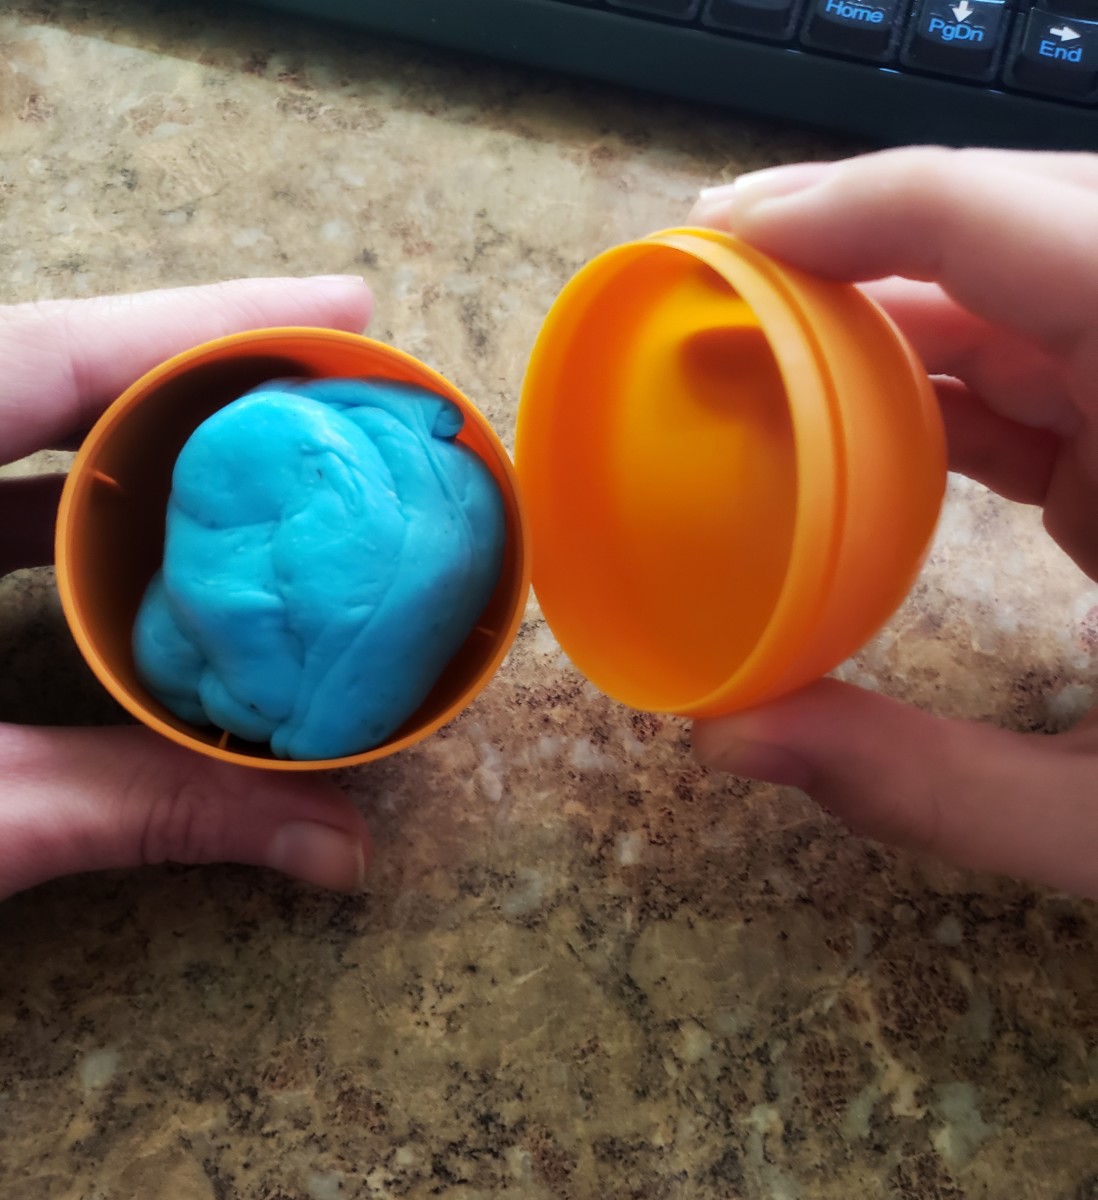
Basic Putty Slime Recipe
Here’s a simple recipe to make basic putty slime. This recipe uses common household items and is perfect for beginners.
Step-by-Step Instructions
- Mix 1/2 cup of glue with 1/2 cup of water in a mixing bowl.
- Add a few drops of food coloring if desired.
- In a separate bowl, mix 1 teaspoon of borax powder with 1 cup of water until dissolved.
- Slowly add the borax solution to the glue mixture while stirring continuously.
- Once the slime begins to form, knead it with your hands until it reaches the desired consistency.
Types of Putty Slime
There are several types of putty slime that you can make, each with its own unique texture and properties.
Read also:Exploring Divaflawless A Comprehensive Look Into Her Life Career And Influence
Glitter Slime
Glitter slime is a sparkly version of putty slime that adds a touch of glamour to your creation. Simply add glitter to your basic slime recipe for a shimmering effect.
Glow-in-the-Dark Slime
Glow-in-the-dark slime is perfect for nighttime fun. Use glow-in-the-dark paint or powder to create a slime that lights up in the dark.
Safety Tips for Making Putty Slime
While making putty slime is generally safe, there are a few precautions you should take to ensure a safe crafting experience.
- Always supervise children when using chemicals like borax.
- Wash your hands thoroughly after handling slime.
- Store slime in an airtight container to prevent drying out.
Customizing Your Slime
Customizing your slime can make it more personalized and fun. Consider adding scents, textures, or even embedding small objects within the slime for a unique experience.
Adding Scents
Essential oils or fragrance oils can be added to your slime to give it a pleasant aroma. Be sure to use oils that are safe for skin contact.
Troubleshooting Common Issues
Even with the best recipes, sometimes things don’t go as planned. Here are some common issues and how to fix them.
Too Sticky
If your slime is too sticky, try adding a small amount of borax solution or liquid starch until it reaches the desired consistency.
Advanced Techniques for Slime Making
Once you’ve mastered the basics, you can experiment with advanced techniques to create more complex slime variations.
Layered Slime
Create a layered effect by making different colored slimes and stacking them on top of each other. This requires patience and precision but can result in stunning designs.
Health Benefits of Playing with Slime
Playing with slime offers several health benefits, including stress relief and improved focus. The tactile nature of slime provides a calming sensory experience that can be particularly beneficial for individuals with anxiety or ADHD.
Conclusion
Making putty slime is a fun and educational activity that can be enjoyed by people of all ages. By following the steps outlined in this guide, you can create your own putty slime at home with ease. Remember to experiment with different ingredients and techniques to find what works best for you. Share your creations with friends and family, and don’t forget to leave a comment below with your favorite slime recipes. Happy slime making!
For more crafting ideas and tips, explore our other articles on the website. Your feedback and engagement help us create better content for you. Thank you for reading!